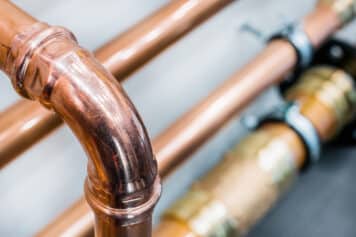
Proper water heater maintenance is crucial for keeping your hot water flowing efficiently and prolonging the life of your unit. One of the most important tasks you can perform is a water heater flush. Over time, sediment builds up at the bottom of your tank water heater, reducing efficiency and potentially damaging the system. This step-by-step guide will walk you through how to flush a water heater, ensuring your home continues to enjoy reliable hot water.
Why Flushing a Water Heater Matters
Sediment accumulation is a common issue in tank water heaters. Minerals from hard water settle at the bottom of the tank, forming a layer of sediment. This buildup can cause:
- Reduced heating efficiency, leading to higher energy bills.
- Noisy operation as sediment interferes with heating elements.
- Shortened lifespan of your water heater.
Regular water heater maintenance, including flushing, can prevent these issues, saving you money and avoiding unexpected breakdowns.
Tools You’ll Need to Flush a Water Heater
Before starting the process, gather these tools:
- A garden hose
- A bucket (optional, for smaller tanks or limited draining areas)
- Heat-resistant gloves (recommended for safety)
- A flathead screwdriver
Step-by-Step Instructions for Flushing a Water Heater
Follow these steps to perform a water heater flush effectively:
Step 1: Turn Off the Power or Gas
For electric water heaters, turn off the power at the circuit breaker. For gas water heaters, set the thermostat to “pilot” mode or turn off the gas supply. This ensures safety while draining hot water.
Step 2: Shut Off the Cold Water Supply
Locate the cold water inlet valve, typically at the top of the tank water heater, and turn it off. This prevents additional water from entering the tank during the flushing process.
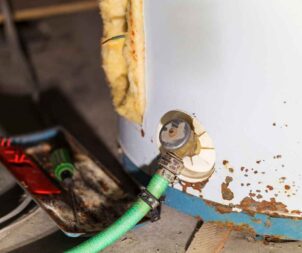
Step 3: Connect a Hose to the Drain Valve
Attach a garden hose to the drain valve, which is usually located at the bottom of the water heater tank. Ensure the other end of the hose is directed to a safe drainage area, such as a floor drain or outdoor space. Keep in mind that the water will be hot, so avoid directing it toward grass or plants.
Step 4: Open the Drain Valve
Carefully open the drain valve using a flathead screwdriver if necessary. Allow the water to flow out completely, flushing out sediment and debris. Be cautious of hot water and wear gloves if needed.
Step 5: Flush with Cold Water
Once the tank is empty, turn on the cold water supply for a few minutes to rinse out any remaining sediment. This step helps ensure the tank is thoroughly cleaned.
Step 6: Close the Drain Valve and Refill the Tank
Close the drain valve securely and turn off the cold water supply. Disconnect the garden hose and slowly reopen the cold water inlet valve to refill the tank.
Step 7: Restore Power or Gas
Once the tank is full, turn the power back on at the circuit breaker for electric models. For gas water heaters, relight the pilot light and set the thermostat to your desired temperature.
Step 8: Check for Leaks
Inspect the tank and connections to ensure there are no leaks. If you notice any issues, contact a professional for assistance.
How Often Should You Flush a Water Heater?
The frequency of flushing a water heater depends on your water quality and household usage. As a general rule:
- If you live in an area with hard water, flush your water heater every six months to prevent significant sediment buildup.
- In areas with softer water, an annual water heater flush is typically sufficient.
Regular water heater maintenance keeps your system operating efficiently and extends its lifespan, saving you from costly repairs or early replacement.
Can You Perform a Water Heater Flush Yourself?
While flushing your water heater is a task many homeowners can handle, there are instances where professional help is beneficial:
- If your water heater hasn’t been flushed in several years, a technician can safely remove heavy sediment buildup.
- If you’re unsure about handling the gas supply or electrical components.
- For tank water heaters with complex designs or advanced features, professional expertise ensures proper maintenance.
When to Call a Professional for Water Heater Maintenance
If you notice any of the following signs, it’s time to reach out to a professional for water heater maintenance:
- Hot water runs out quickly, indicating excessive sediment in the tank.
- Loud popping or banging noises from the water heater.
- Reduced water pressure caused by sediment blocking pipes.
- Leaks around the base of the tank.
Ignoring these issues can lead to more significant problems, including total water heater failure.
The Benefits of Professional Water Heater Maintenance
Hiring a professional ensures that your water heater receives thorough care. Experts can:
- Flush the tank efficiently, even in challenging conditions.
- Inspect the anode rod, which prevents corrosion inside the tank.
- Identify and address any potential issues before they escalate.
By investing in professional water heater maintenance, you’ll enjoy peace of mind and optimal system performance.
Call Harris Today!
Performing a water heater flush is an essential maintenance task that prevents sediment buildup, improves efficiency, and prolongs the life of your tank water heater. While you can complete the process yourself, professional help ensures the job is done right and your system remains in peak condition.
For all your water heater maintenance needs, trust the experts at Harris Plumbing, Heating, Air & Electric. Whether you’re due for a routine water heater flush or need assistance with repairs, our team is here to help. Contact us today to schedule your appointment and keep your water heater running smoothly!